
Introduction
What Is Staff Assisted Check-in?
Staff Assisted Check-in allows hosts to:
- Connect and manage multiple guest-facing tablets.
- Push check-in flows(quick actions) and registration cards to those devices.
- Monitor form submissions in real time.
- Reset and prepare devices between guest sessions.
Offer guests a self-service kiosk-like experience.
Pricing
How to Set It Up
For multi-brand accounts:
Go to Settings
Select the relevant brand
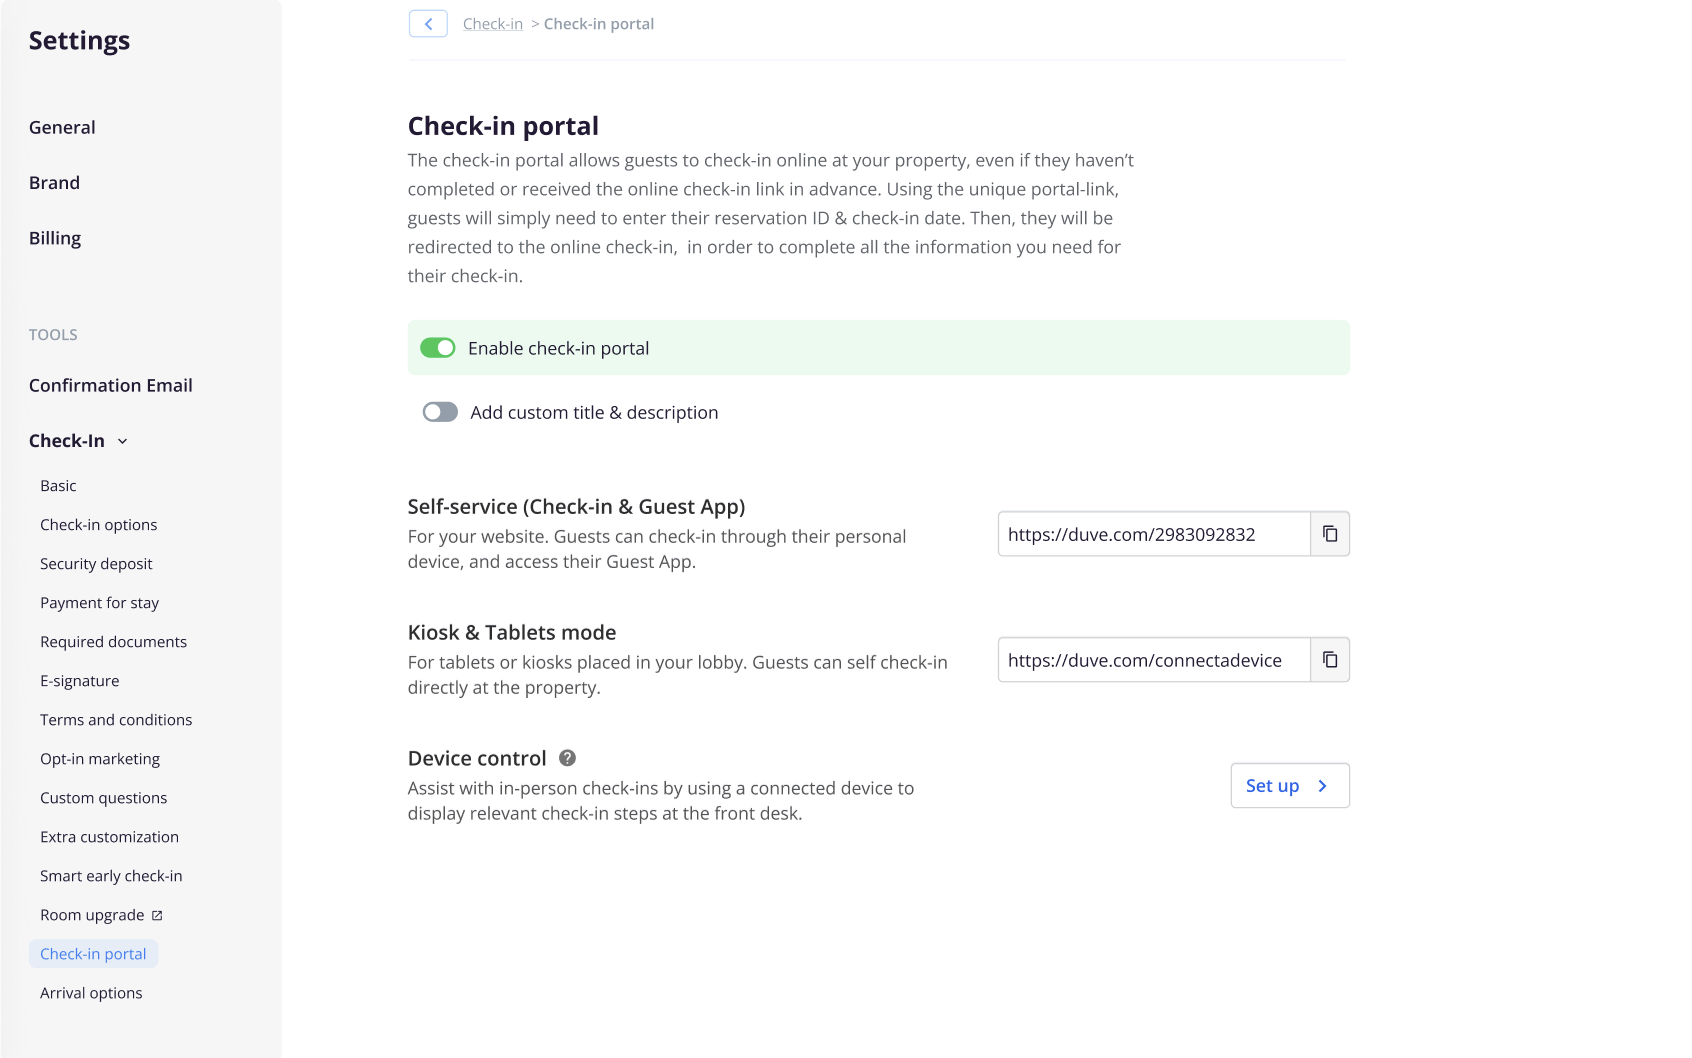
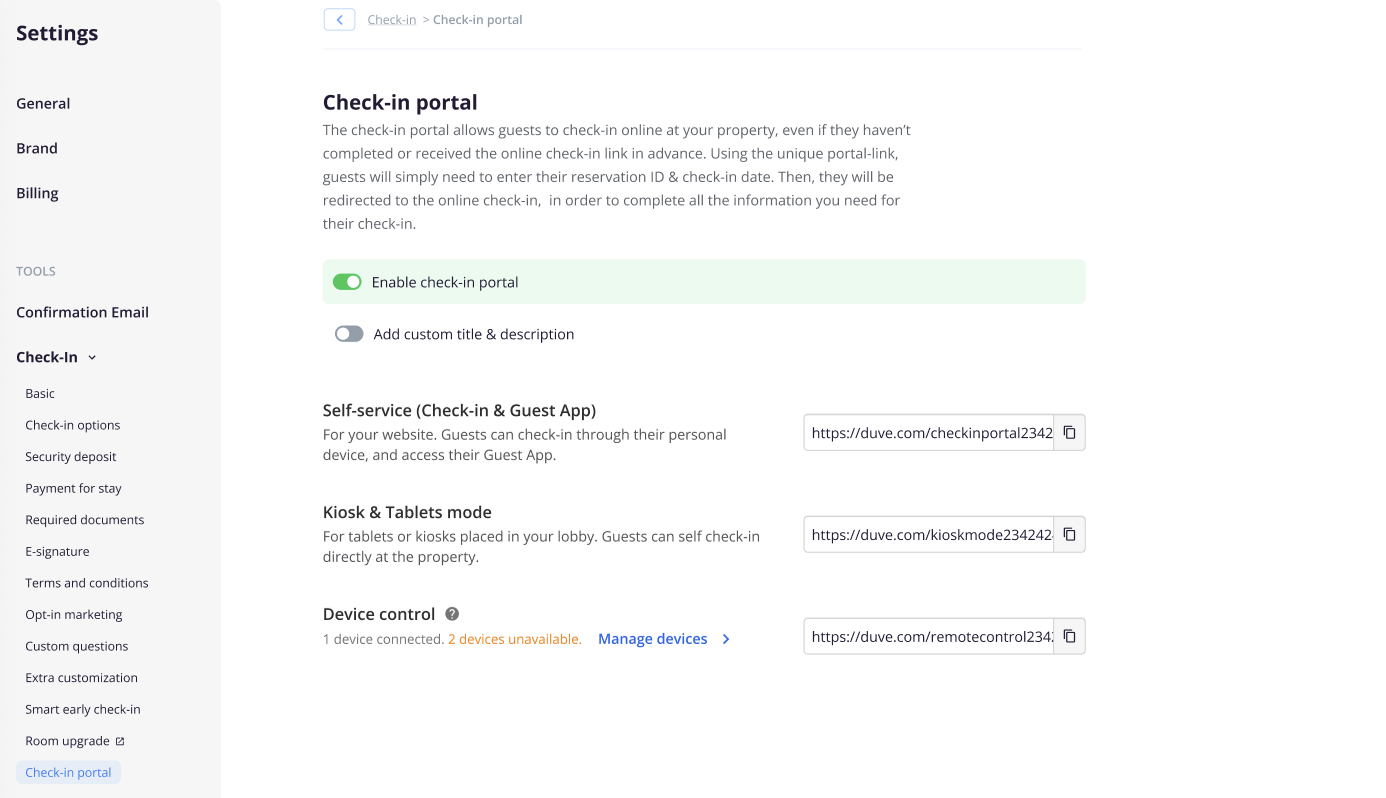
Navigate to Check-in > Check-in Portal
Enable the Enable check-in toggle at the brand level
A new toggle named Device Control appears under the Check-in Portal tab.
Click Set up to begin the process.
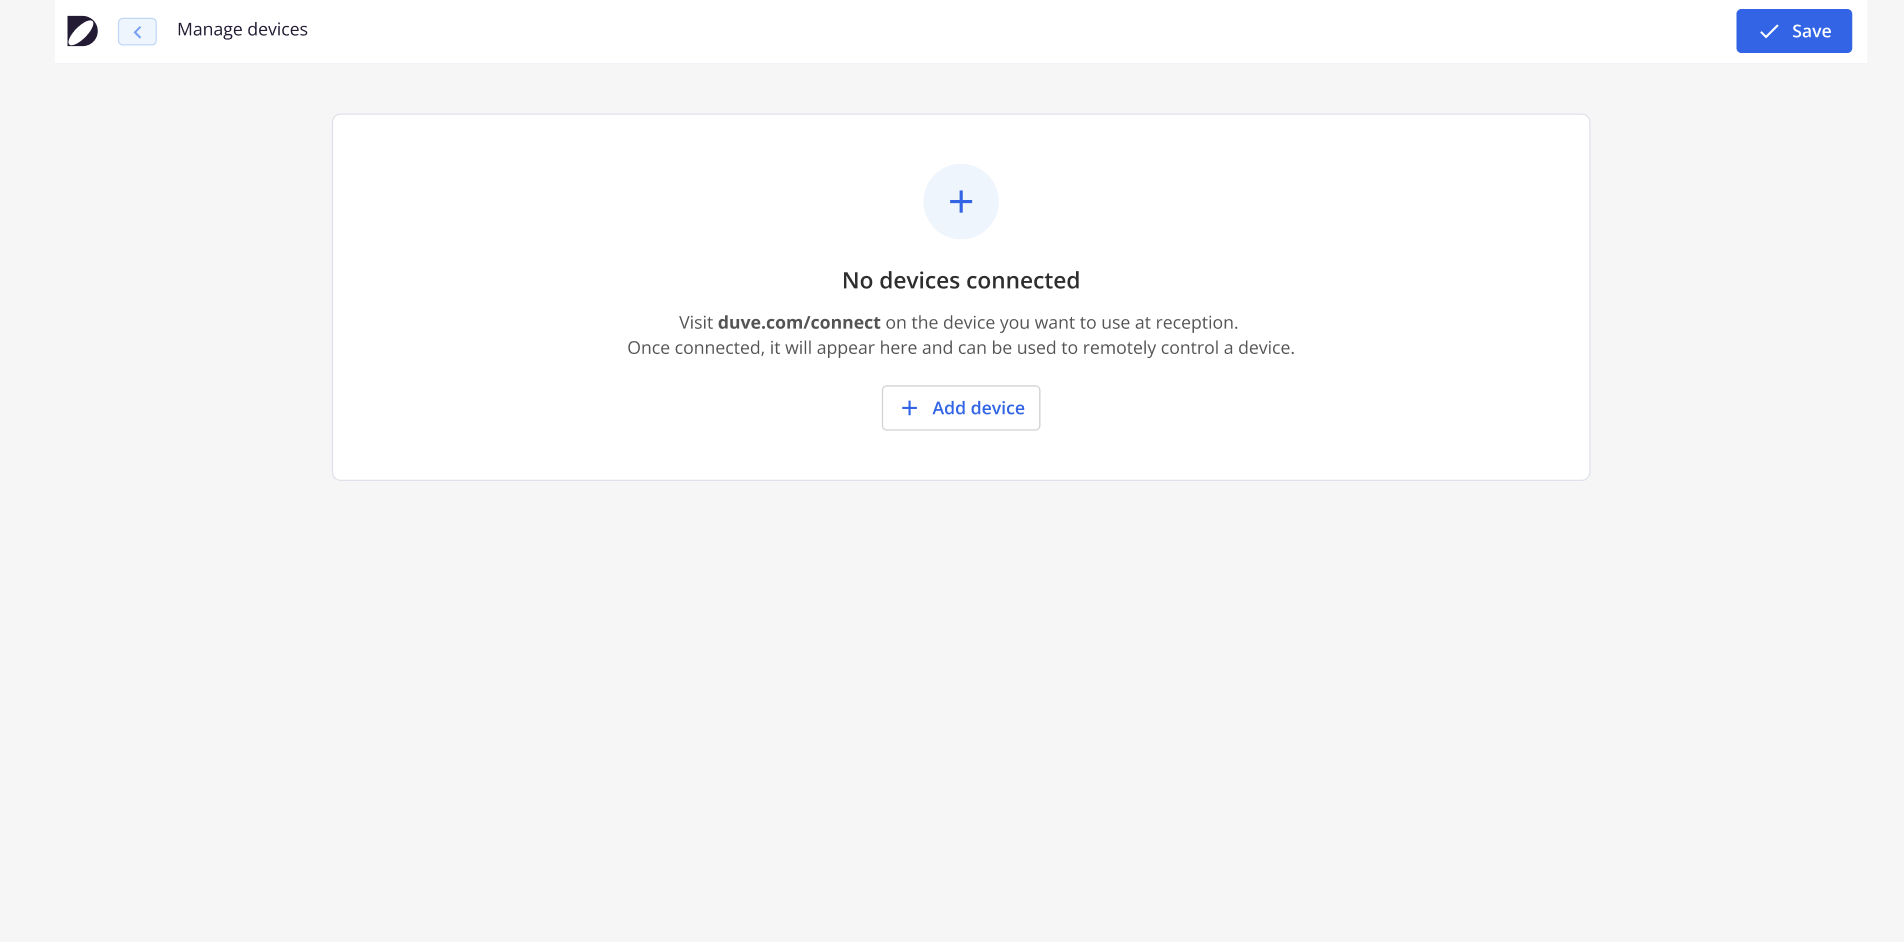
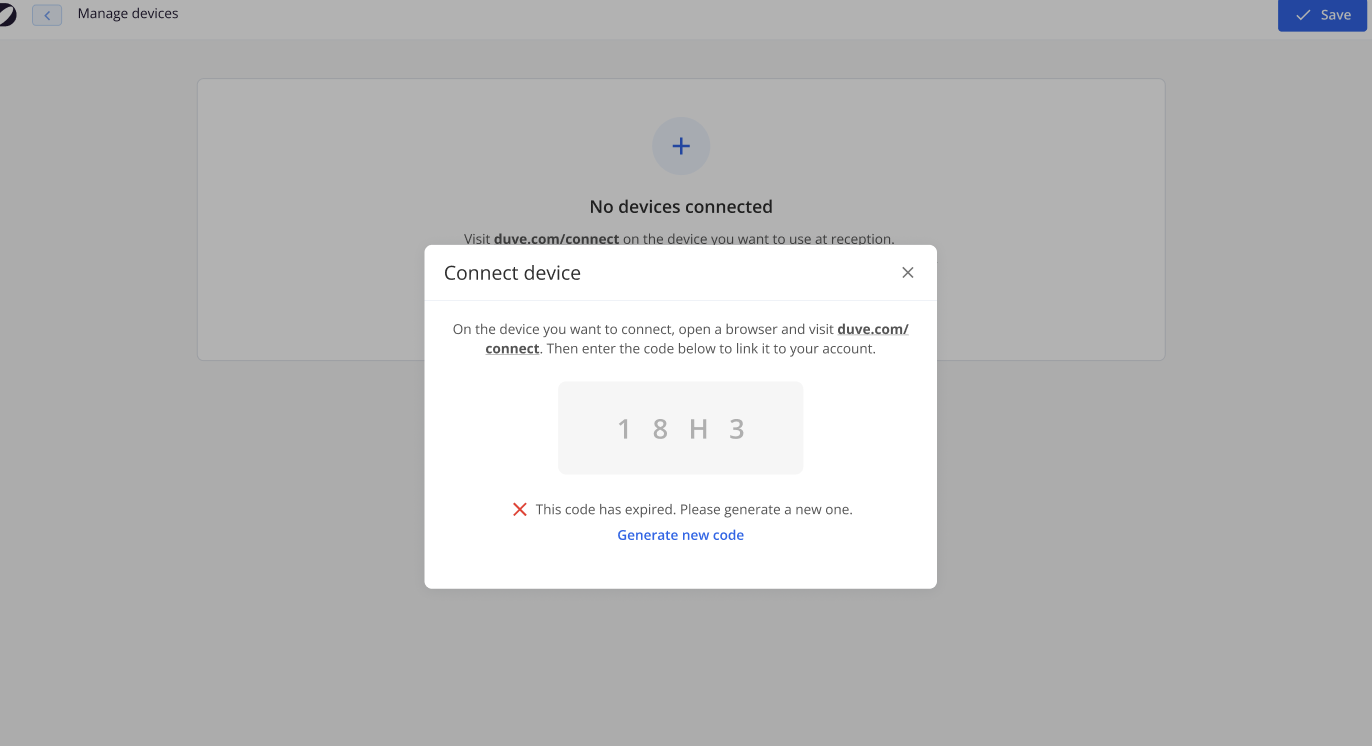
Connect a Device
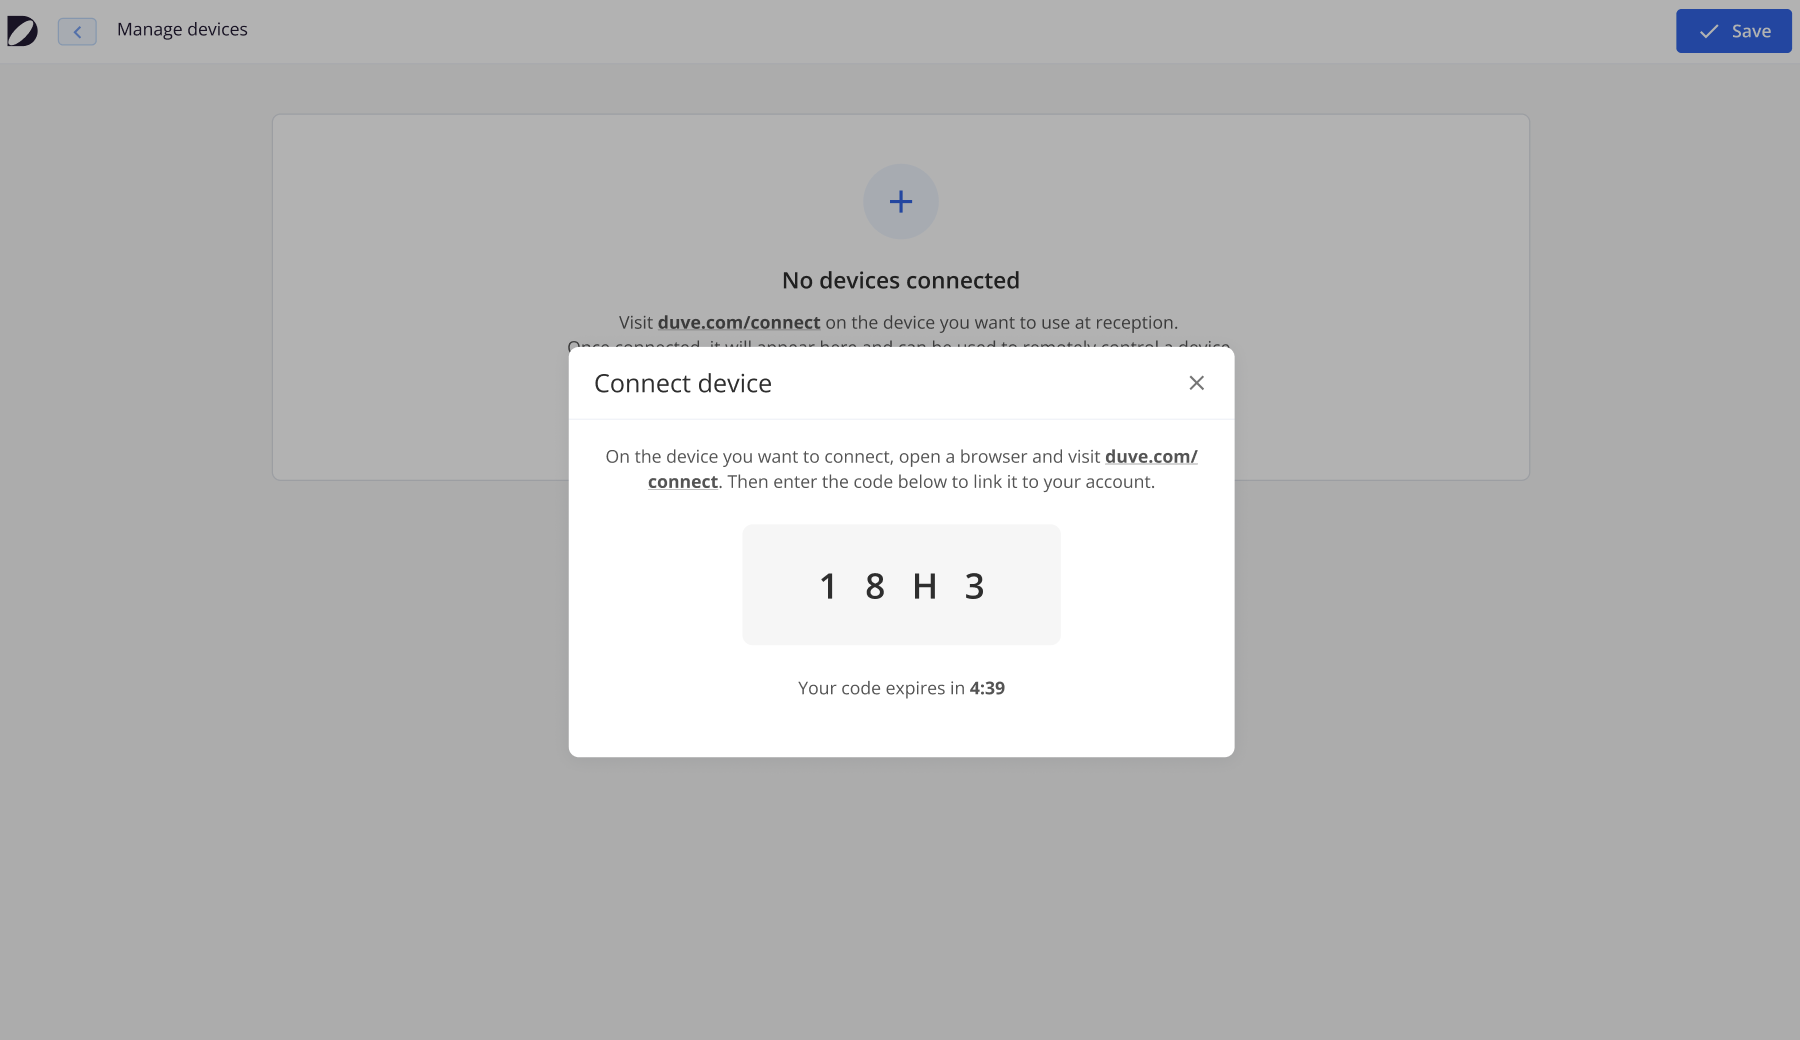
Click Add Device to generate a 4-digit connection code
2. On the external tablet, visit the provided URL and enter the code
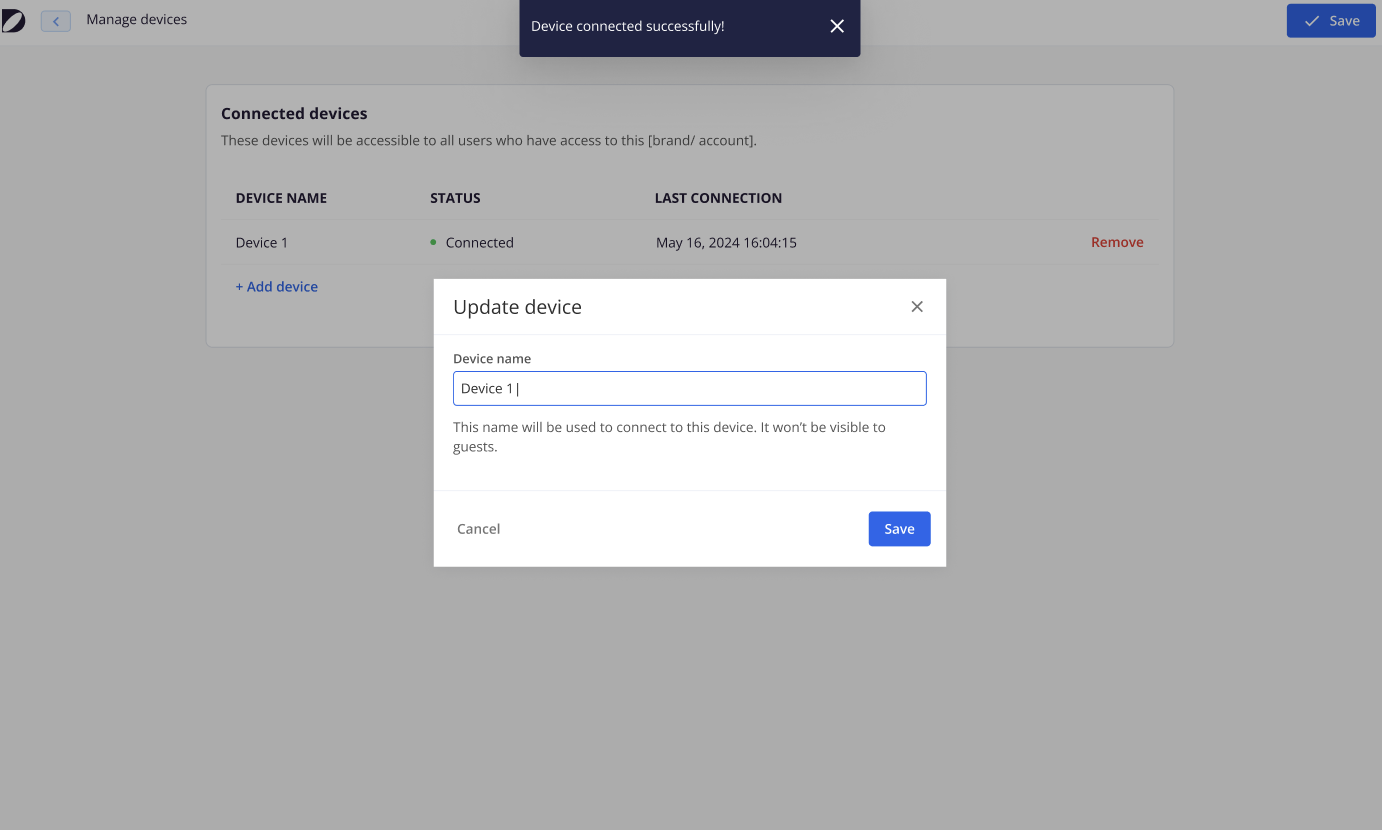
Each device must have a unique name.
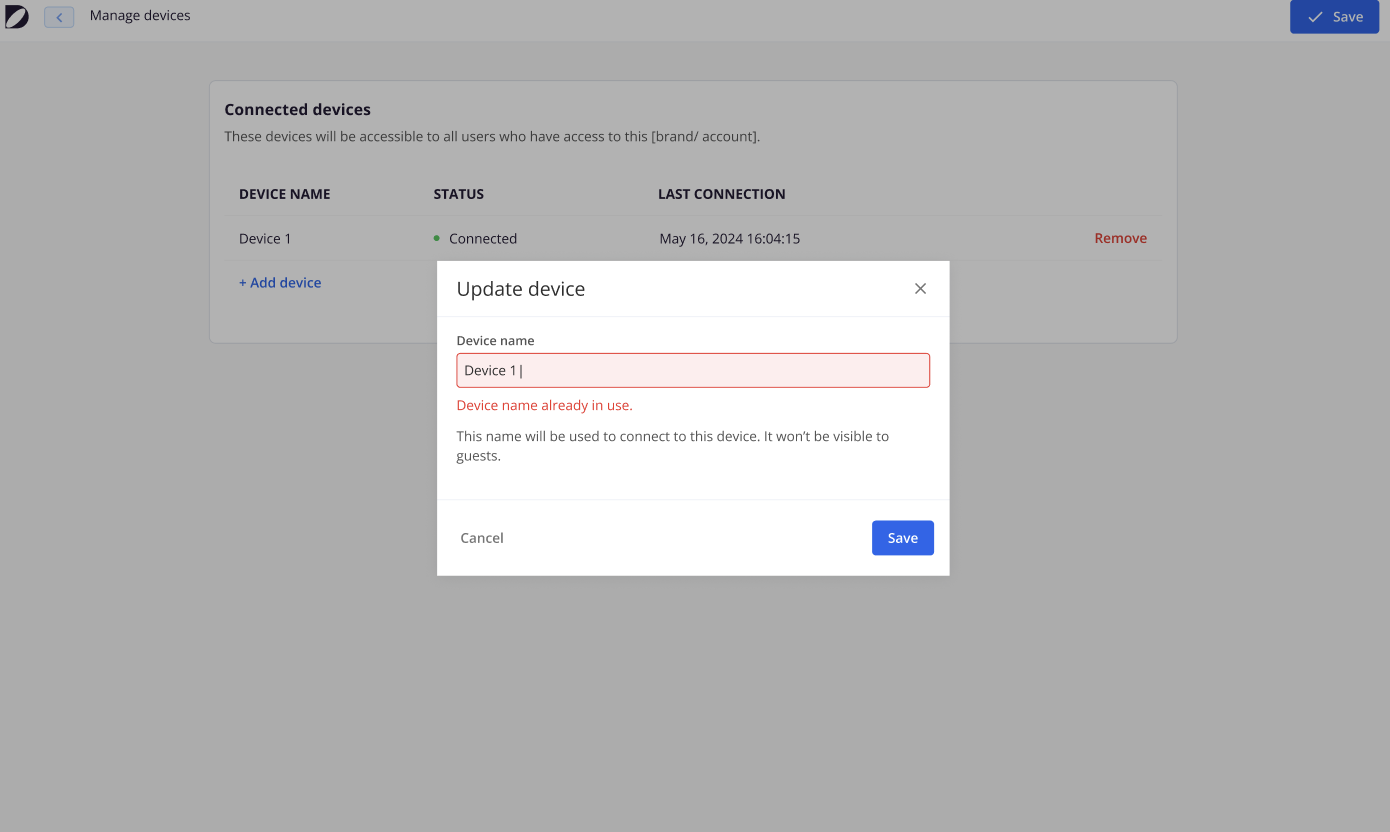
3. Device Management
Connected devices can be viewed and managed from the Device Management screen.
Available actions include:
- View connected devices under the Device Management screen.
- Actions available:
- Rename device.
- Remove device (with confirmation).
- Resync device if the connection is lost

An overview indicator shows the total number of connected and unavailable devices:
Managing Devices from the Front Desk
For properties with Staff Assisted Check-in enabled, a Devices icon appears in the front desk header.
The icon displays:
The number of connected devices
The number of disconnected devices
All users can open the Devices panel to view device status. However, access to device setup actions and settings depends on user permissions.
Inside the panel, staff can see:
A list of connected devices
A list of disconnected devices
Each device’s status and last connection time
Devices are listed alphabetically for easy identification.
Resyncing a Disconnected Device
If a tablet becomes disconnected (for example, due to network or power issues), it can be restored directly from the front desk or from the Control Device settings page.
When a device is disconnected, a Resync option appears next to the device name:
NOTE: The Resync option is available to front desk staff and does not require access to platform settings or admin-level permissions.
When resyncing a device:
The external tablet automatically refreshes and displays the connection screen
A new 4-digit connection code is generated:
3. The host enters the code to reconnect the device:
Once reconnected:
The device status updates to Connected
The last connection time is refreshed
The existing device name is preserved
No backend assistance is required to complete this process.
NOTE: Resyncing restores the existing device connection without removing or reconfiguring the device.
How to Use It
From the Reservations, Task Manager, or Communication Hub pages, hosts can click "Send to device".
Tasks Page:
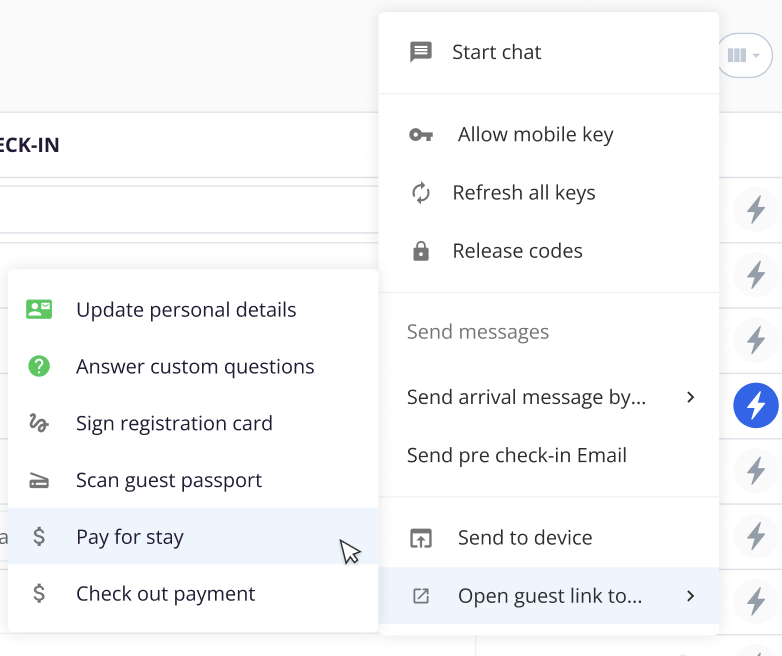
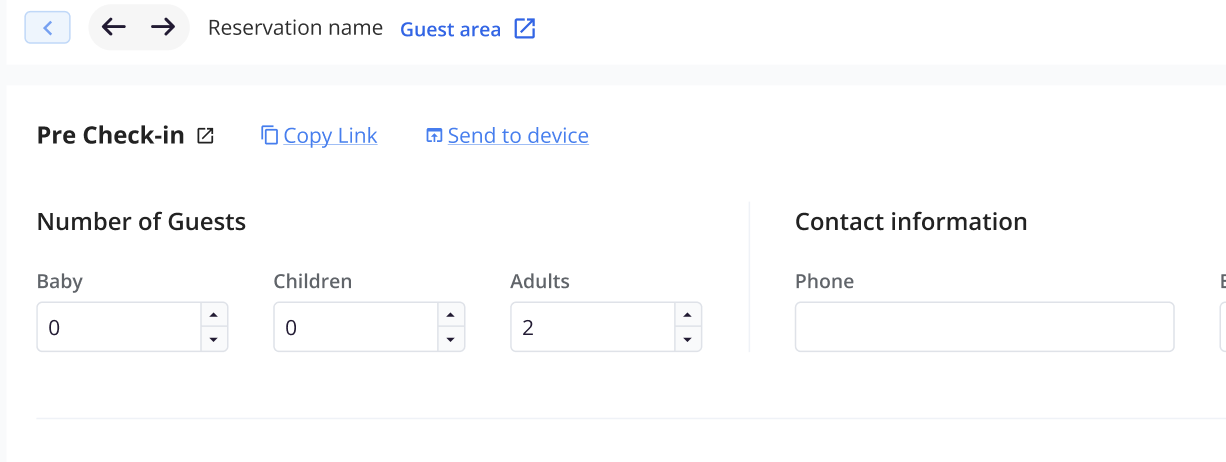
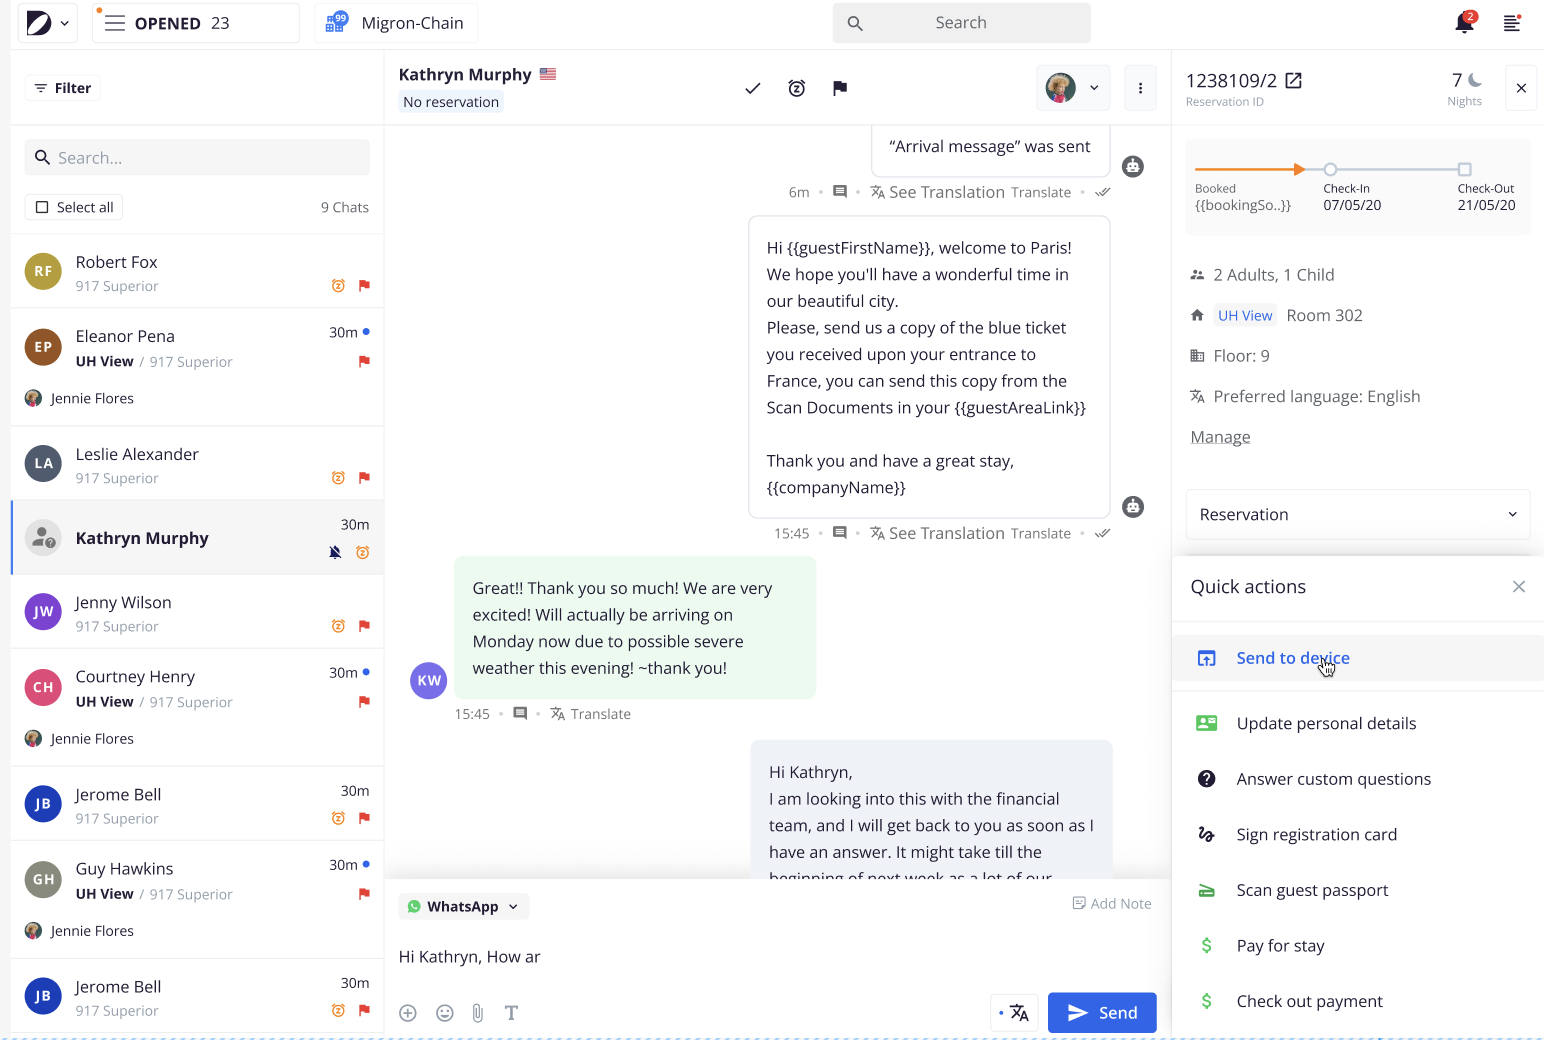
Select the desired check-in flow page (e.g., Sign Registration Card, Update Personal Info) and select which device to send the page to.
Click “Start Sharing” to push the page to the guest-facing tablet.
Monitor the session through a broadcast toolbar — stop or adjust content as needed.
From the Host's View during the time that the guest is completing the page sent to the device:
When the guest has successfully completed the form sent to the device.
Session Interrupted or Device Connection Errors

If further investigation is needed for failures connecting the devices, please inquire with Duve Support.
Host View
In case the connection to the device is lost during the sharing for any reason, an error message will be displayed at the broadcast bar for 5 seconds. Then, go to Resync device.
Tips & Tricks
Label Your Devices Clearly
Save Time with Defaults
Handle Page Changes Smoothly
Recover Devices Quickly
If a tablet disconnects, use the Resync option from the front desk to restore it immediately.
Desktop-Only Actions
User Permissions
Only Manager-level users can access the Remote Control section.
Comments
0 comments
Please sign in to leave a comment.