
This guide provides step-by-step instructions for activating the integration between Luckey and Duve. It enables automated syncing of reservations and the generation of guest access credentials like PIN codes or email invitations. The integration ensures a seamless guest experience by populating codes directly into the Duve platform. It is intended for teams responsible for onboarding and operations setup.
How to set it up
Step 1: Set up Access Code sync from Luckey to Duve
- Go to: Settings → Connections → DuveConnect → Incoming.
- Create a new connection and provide a name and description.
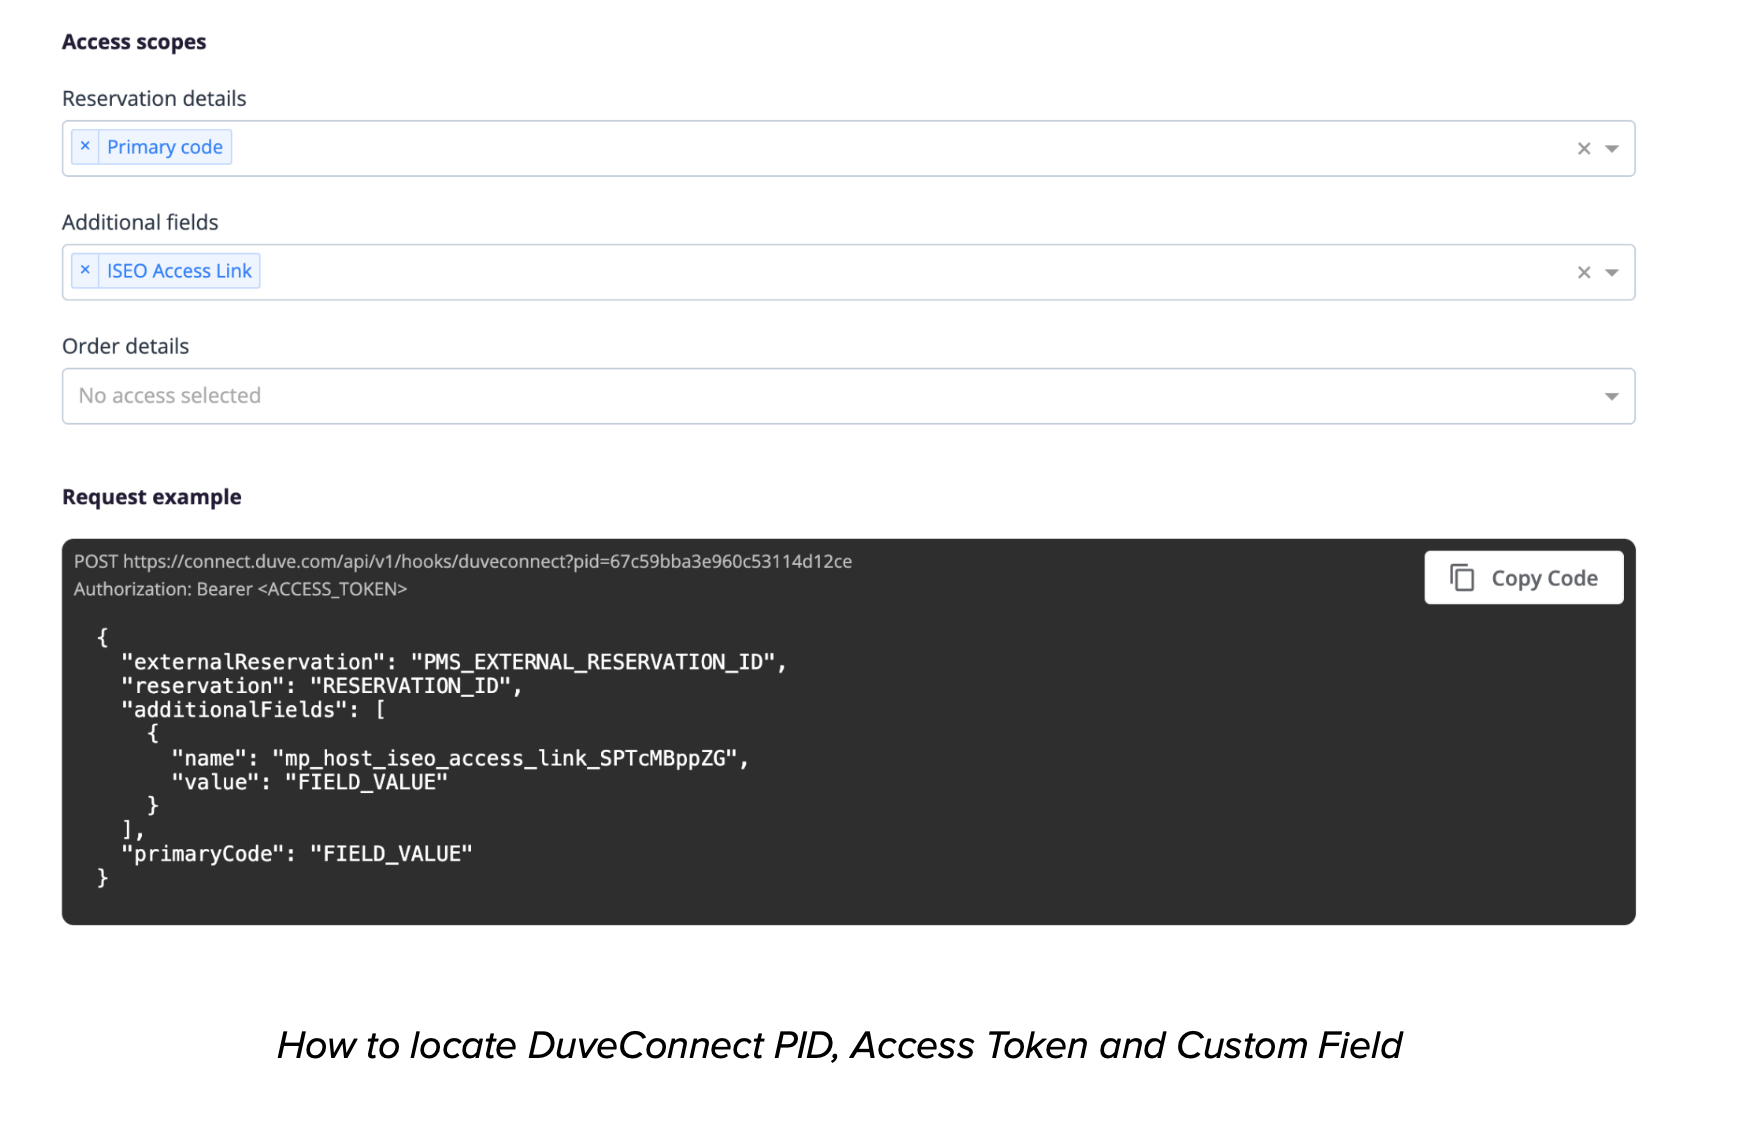
- In the connection, under Access scopes, check "Reservation Details → Primary code".
- If you plan to generate Invitations for Duve guests, first create a Duve Additional Field and select it during this setup.
Skip this step if you don’t want to generate PINs, invitations, or use the Duve reservation system.

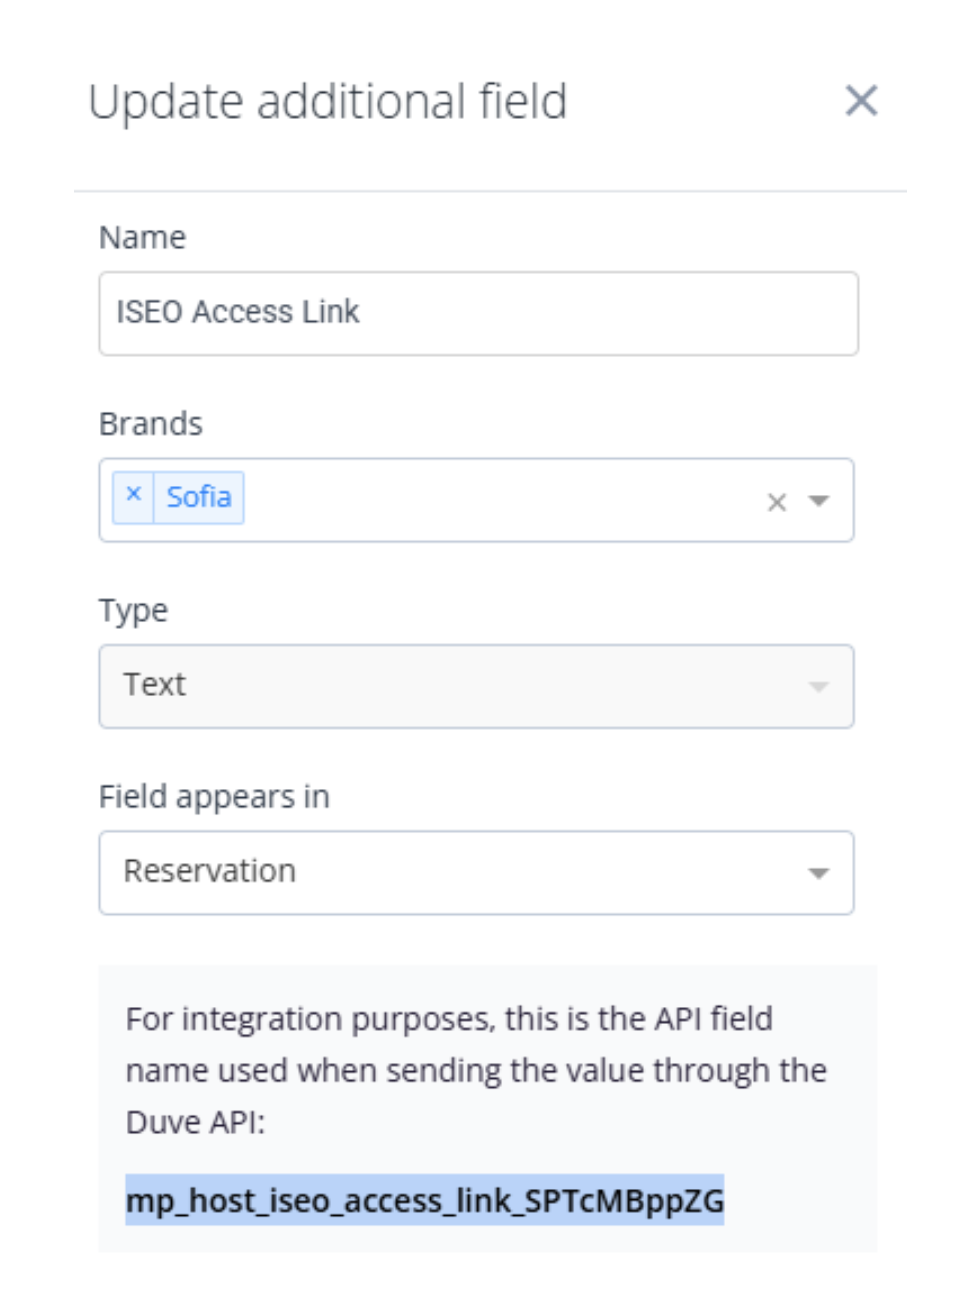
Step 2: Create a Custom Field (Optional)
Only needed if using Luckey Invitations as access credentials.
- Go to Duve → Connections → Additional Fields.
- Create a new field as per the example shown in the original document.
- Save the Duve API field value shown—this will be used in Step 4.
- Add this field to the Incoming Connection setup (see Step 1).
Step 3: Setup Integration in Luckey
In the Luckey Web Platform:
- Navigate to Settings → Duve.

- Insert your DuveConnect credentials:
- PID: From “Example request” in DuveConnect page.
- Access Token: From the same page.
- In the Credentials Type section, choose what to generate for each Duve reservation:
- Invitations (email-based)
- Smartphone Credentials (for the mobile app)
- PIN Codes (for keypads)
If you want the generated credentials pushed back into the Duve guest application:
- For PIN Codes: Toggle Return PIN to “Yes.
” Luckey will send the newly created PIN back to Duve.
- For Invitations: Enter the Duve Custom Field ID where invitations should be stored.
This ID comes from Step 2 of your Duve setup
Step 4: Setup Webhooks (Outgoing Connections) in Duve
Once integration is activated in Luckey, you’ll receive three webhook URLs:
- Reservation Created
- Reservation Status Updated
- Reservation Room Assigned
Configure these in Duve → Connections → DuveConnect → Outgoing.
Webhook 1: Reservation Created
- Event: Reservation (created)
- Endpoint URL: Use provided webhook URL from Luckey
- Required Data Points:
- Booking/Reservation ID
- External Property ID
- Reservation status
- Verified email, first name, last name
- Check-in/check-out date
- Estimated check-in/out time
Webhook 2: Reservation Status Updated
- Event: Reservation status
- Endpoint URL: Use respective Luckey URL
- Same Required Data Points as Webhook 1
Webhook 3: Reservation Room Assigned
- Event: Reservation room-assign
- Endpoint URL: Use respective Luckey URL
- Required Data Points:
- Booking/Reservation ID
- External Property ID
✅ Ensure all three webhooks are set to “enabled” in Duve.
Comments
0 comments
Please sign in to leave a comment.