
How does configuring a custom email domain work?
Duve can be configured to deliver emails to guests on your behalf via your email domain to increase guest engagement and brand awareness. Until this configuration is updated by a user, Duve sends emails using its own pre-assigned domain,
mail.duve.co.Configuring a custom email domain does not affect incoming mail or any other aspect of your existing email setup. The domain verification only permits Duve to send communications on your behalf.
Duve sends through Amazon SES, so the records you add authorize Amazon SES to send as your domain.
Note: replies from guests continue to arrive in your Duve inbox, not in your own mailbox. The reply-to address on guest emails stays a Duve address so that replies are routed into Duve chat. Only the "from" address changes.
How to Find Your Email Domain:
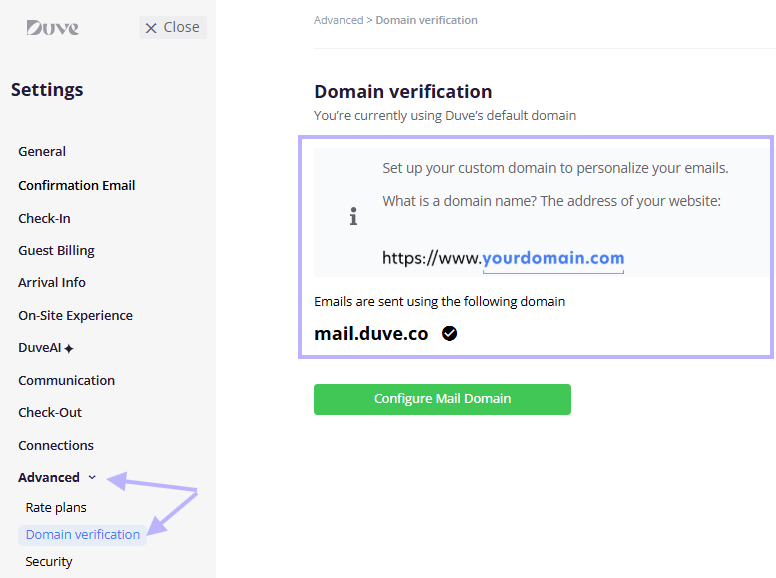
How to Configure Your Email Domain:
- In Settings, go to the 'Advanced' tab, scroll down the menu, and then select the 'Domain Verification' section.
- Click 'Configure Mail Domain' and enter your domain name, e.g., 'yourbrand.com':
- Click 'Set Domain'.
Your domain must be a real domain you own. Duve will reject a public email provider (for example, gmail.com), an address rather than a domain (anything containing '@'), a domain starting with 'www.', and any domain whose nameservers cannot be resolved. In those cases, you will see "Invalid domain". - To complete the setup, the following DNS record changes are required to verify ownership of the domain. You may require IT assistance to help with this step, as it requires logging into the host provider account where the domain name is registered to make the changes.
Note: Do not use the values below; this is just an example. Use the record values listed in your account.
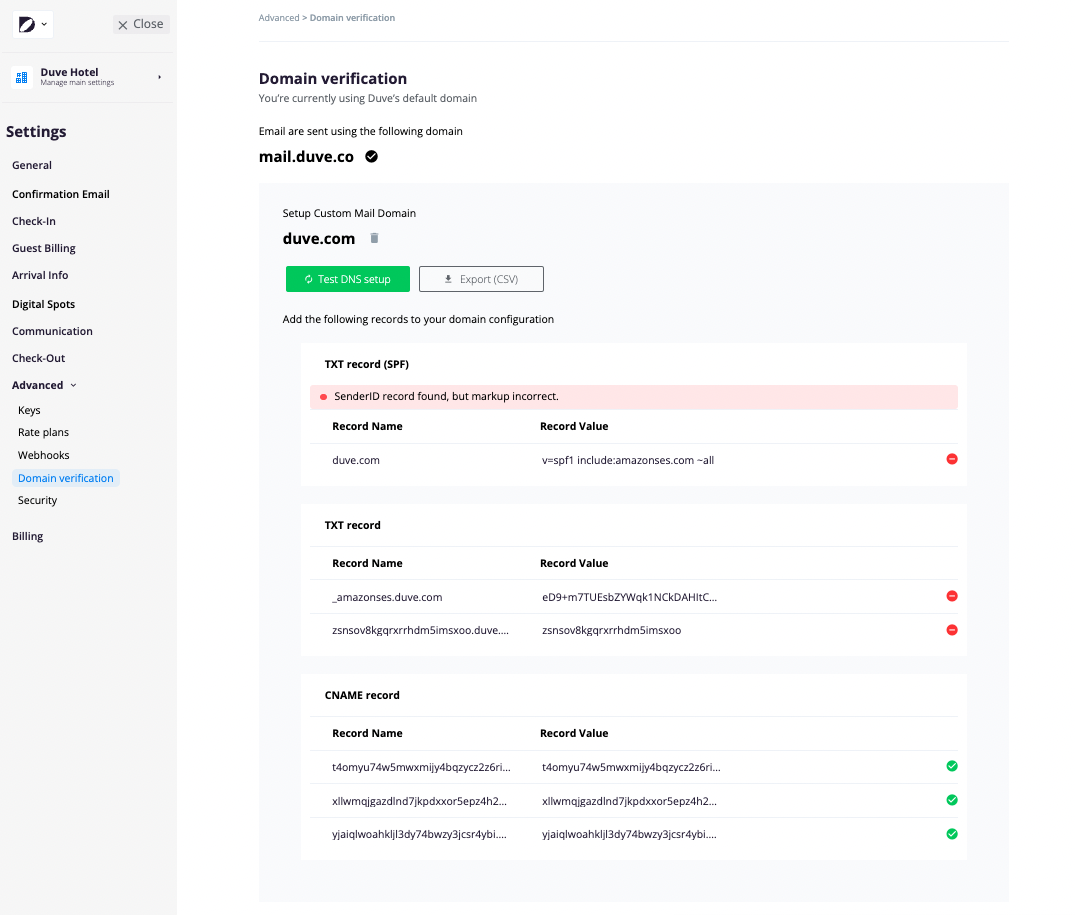
Six records are generated in total, in three groups:
-
TXT record (SPF), one record: The record name is your root domain, so most providers expect '@' here. The value is
v=spf1 include:amazonses.com ~all. -
TXT record, two records: One is named
_amazonses.yourbrand.comand carries your Amazon SES verification token. The other is named<key>.yourbrand.com, and its value is that same key, which is Duve's own ownership check. -
CNAME record, three records: Each is named
<token>._domainkey.yourbrand.comwith the value<token>.dkim.amazonses.com. These are your DKIM keys, and all three are required.
All six records must pass before the domain is verified. The way each record type is added will vary depending on your domain provider's interface.
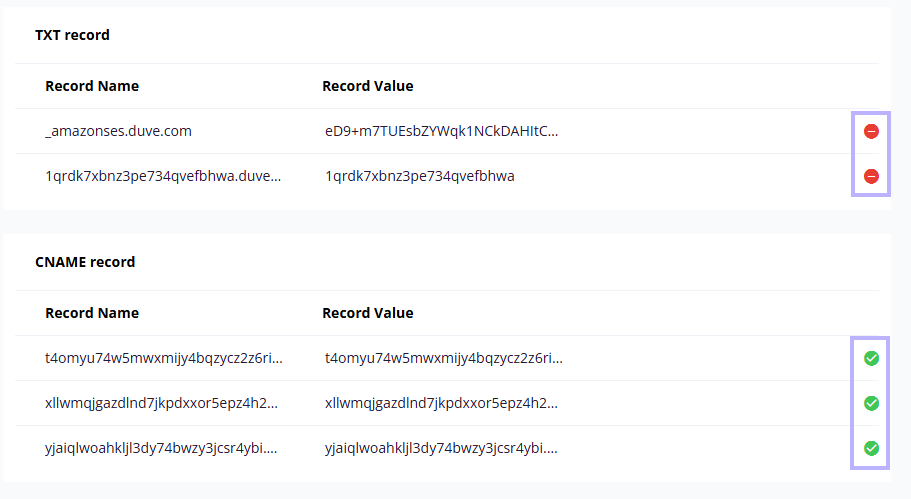
A green check next to a record means your domain provider is returning the expected value. A red minus means it is not. No icon is shown next to a record until a test has actually run, so an empty status column means "not tested yet", not "failed".
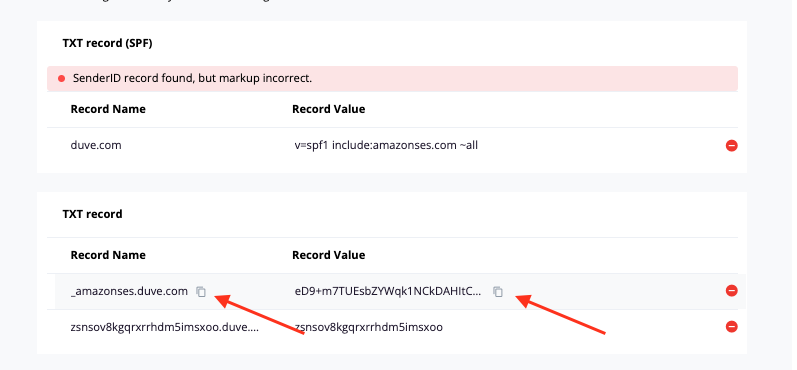
To copy a value, hover over the row and use the copy button next to it. For the TXT and CNAME record names, the copy button removes your domain from the name, because most providers add it automatically. For the TXT record (SPF), the copy button gives you your full domain name, so replace it with '@' if your provider expects that for the root domain.
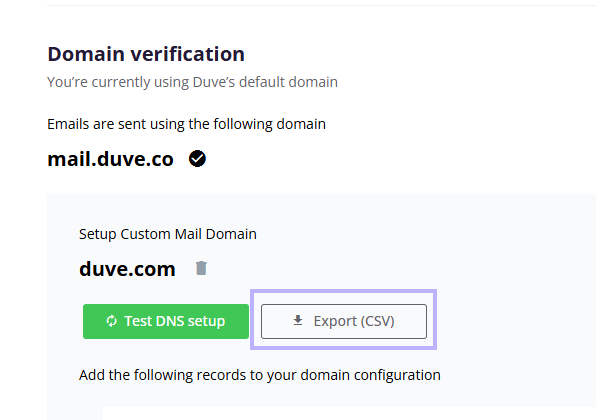
You can also click 'Export (CSV)' to download the full record set as a spreadsheet named "yourbrand.com DNS Records". This is usually the easiest thing to send to your IT team or your hosting provider.
Troubleshooting note: You may find that the wording of what we have labeled 'Record Name' and 'Record Value' is slightly different at your provider. If you encounter difficulty changing your DNS records, it can help to read your domain provider's documentation.
Here are links to popular domain hosting providers’ documentation:
- Blue Host
- GoDaddy
- Google Cloud DNS
- Namecheap
- Rackspace
- Digital Ocean
- Cloudflare
- Wix (adding TXT records, adding CNAME records)
Important Note for GoDaddy & Cloudflare users: the record name for the TXT record (SPF) should be entered as '@', because that record goes on your root domain.
When entering any other record name, remove your domain name from it. For example, enter
_amazonses rather than _amazonses.yourbrand.com.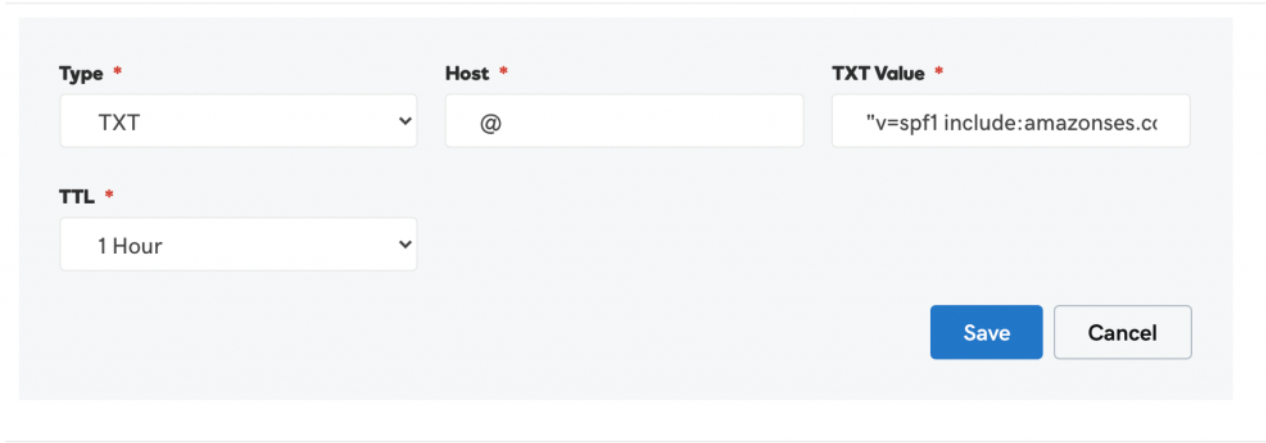
5. Once you've made these changes, you can verify them by clicking 'Test DNS setup':
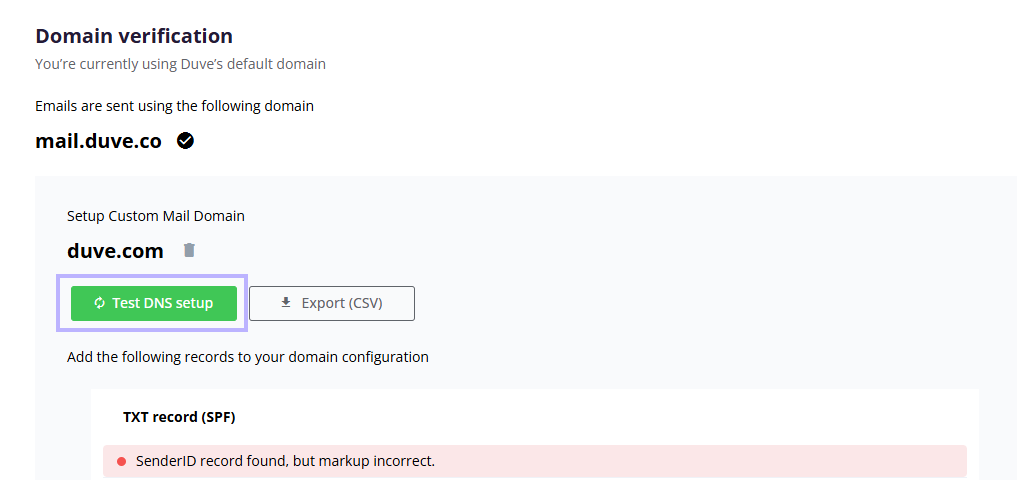
Important Note: changes to your DNS records can be immediate or may take hours to update, depending on your provider. Our DNS test will only detect live changes. If a domain is still pending, Duve also re-runs the test automatically each time you open the Domain Verification section.
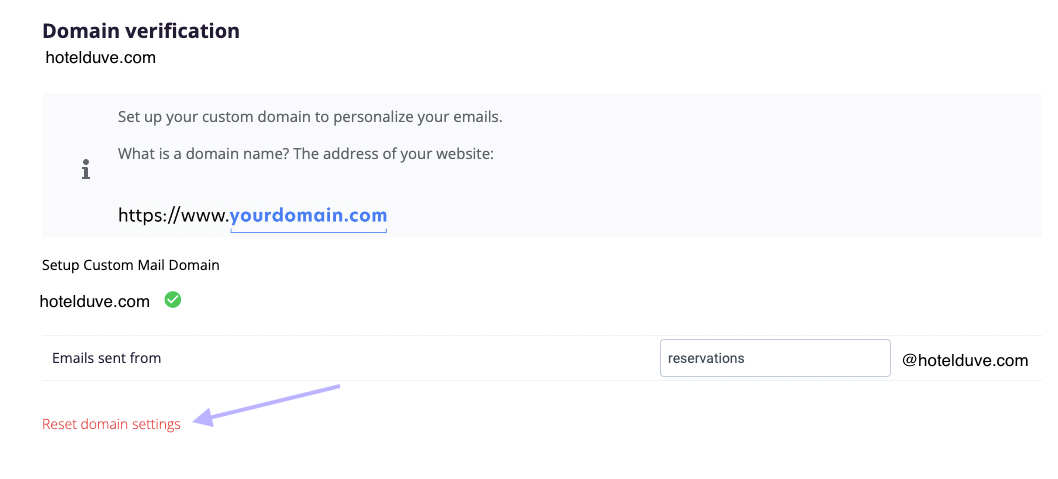
6. When the domain is connected, Duve shows the verified domain with a green check, and the last step is to insert the first part of the email address in the 'Emails sent from' field.
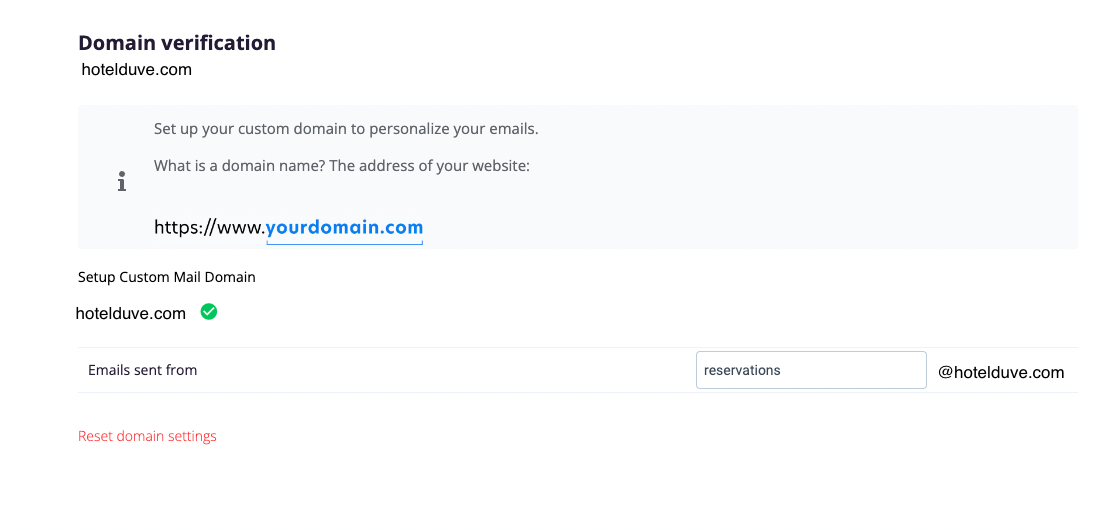
Important Note: This prefix is required. Until you enter it, Duve keeps sending from its own address, even though the domain shows as verified. Enter a prefix such as
reservations so that guest emails are sent from reservations@yourbrand.com.
To undo the setup, click 'Reset domain settings' at the bottom of the section, or use the trash icon next to the domain on the DNS records screen. This clears the domain and returns you to the start of the flow.
- Important Note for Multi-Account users: You must set up domain verification on each Duve account. If you use brands, each brand can either inherit the account setting or use the 'Override default options' toggle to verify its own domain. See "Domain Verification By Brand".
- Important Note for Expedia: The email domain listed must be in Expedia's list of whitelisted emails.
Common Errors
- You have more than one SPF record. You need to combine your SPF records into one record. Multiple SPF records may cause delivery and spam classification issues. Duve reports this as: "Multiple SenderID records found, including a valid AmazonSES record. Please combine them so there's only one 'v=spf1' TXT record."
- You can only have one Sender ID TXT record that starts with 'v=spf1 ...'. This may present an issue if you need more than one for other domain verifications (for example, Google Analytics). There is a way around this: add the entries between the 'v=spf1' and the closing 'all', like so:
v=spf1 include:amazonses.com include:google.com ~all. - Watch the spaces in the SPF record. Our validation looks for
include:amazonses.comwith a space on each side, so a value such asv=spf1 include:amazonses.com~allfails even though it looks correct. Keep a space before~all. - Your SPF record must end with 'all' and nothing after it. If it does not, Duve reports: "SenderID record found, but markup incorrect." If no 'v=spf1' record is found at all, Duve reports: "No correct record found."
- All three DKIM CNAME records are required. Adding one or two of them is not enough for the domain to verify.
- Network Solutions can take up to 24 hours for any DNS changes to take place. Please keep this in mind when checking your Duve account right after making changes.
- Bluehost will sometimes use a ‘?’ instead of a ‘-’ in front of the ‘all’ in their Sender ID; however, this will throw an error in our DNS validation. To fix this, update the Sender ID in your DNS records to use a ‘-’ instead of the ‘?’.
- Amazon Web Services, or AWS, does not allow the ‘@’ for configuring a Sender ID. Please use your normal domain name as the host.
-
GoDaddy does not allow ‘.’ at the end of a DKIM CNAME entry. Enter it without the trailing dot, for example
abc123._domainkey. - Transip users must add a trailing dot behind the CNAME record value when adding the Duve value into your domain
-
OVH has some trouble saving underscores in a CNAME record for DKIM in their new interface. Here is a workaround from their Support team:
- Create the CNAME record without underscores
- Go to the “Old Customer Interface” (Managerv3) and then to DNS Zone .
- Click on “View DNS zone in text mode”
- Add the underscores to the Duve CNAME line in the text editor.
- Wix has guidance about adding TXT and TXT (SPF) records, and about adding CNAME records.
Comments
0 comments
Article is closed for comments.